Do You Know How to Configure Catch-All Routing on G Suite?
How to Configure Catch-All Routing on G Suite
Well, I will show you how. First, let’s talk about what catch-all routing is and why you need it.
A catch-all, also called a wild-card email address, refers to your chosen G Suite mailbox for catching all emails sent to any nonexistent email address on your domain, and it doesn’t matter if that nonexistent address is jldjfdo@yourdomain.com or a@yourdomain.com. It doesn’t matter the combination the sender uses. So far as the email address is associated with your domain, you will receive the email in your catch-all mailbox.
At Macaulay Gidado, we configured catch-all routing to avoid losing emails when customers misspell any of our email addresses. So if you are a business, I recommend you set yours up.
Catch-all routing also came in handy when we were starting out as a business.
- First, it allowed us to set up email aliases (on our domain) that don’t just send emails but also receive them. The only downside to this is that all emails go into one email box, unless you set up filters and forwarding. Anyway, this is something that can also be fixed with Slack-Gmail integration if you work with a team. Using Gmail filters and labels can also help you makes sense of everything in your inbox.
- Like any other business, we had departments. It only made sense to use support@ourdomain.com for sending and receiving support emails, and info@ourdomain.com for managing inquiries. It made us look professional. Naturally, we would have needed to register a G Suite user for “support”, and then another for “inquiries”, and so on. Initially, we went with combining catch-all routing and aliases. It was fun while it lasted. But it’s not scalable if you work with a team.
I think this second benefit is more suited for a one-man business. It’s not going to save you much. But the savings can buy you coffee on a boring day.
Without any further ado, here’s how to configure catch-all routing on your G Suite
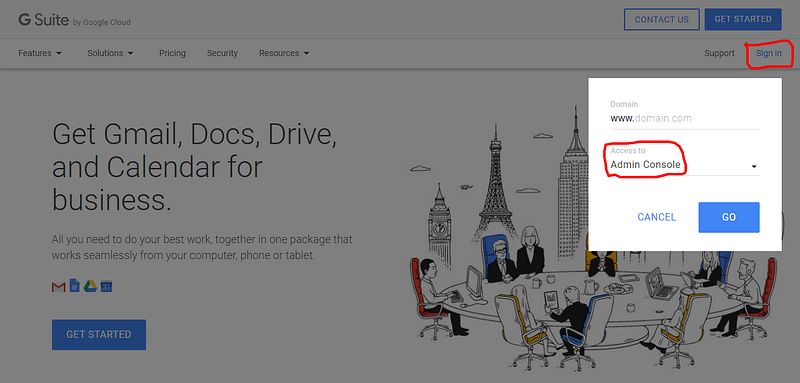
- Got to https://gsuite.google.com/ and Sign in to Admin Console
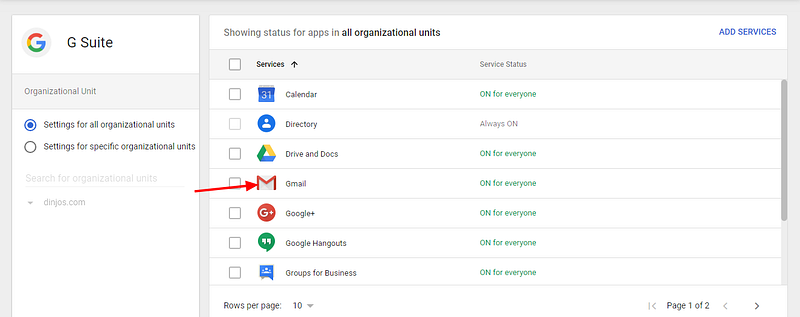
- Now, click Apps
- Click G Suite
- Click GMail
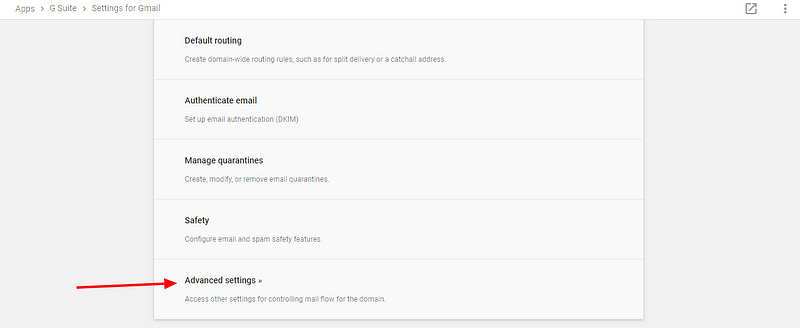
- Scroll to the bottom of the next page and click Advanced Settings
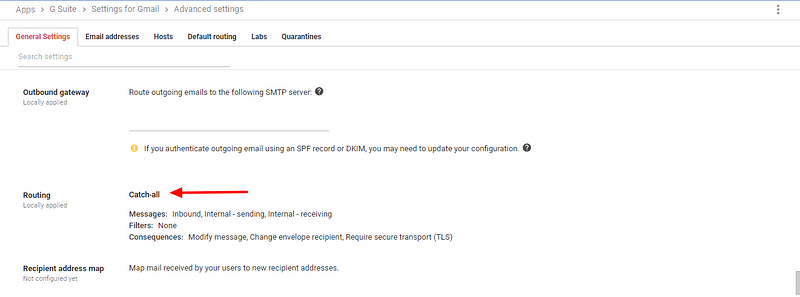
- Once on the following page, press “Ctrl + F” on your keyboard and then type in “Catch-all” to find the catch-all section.
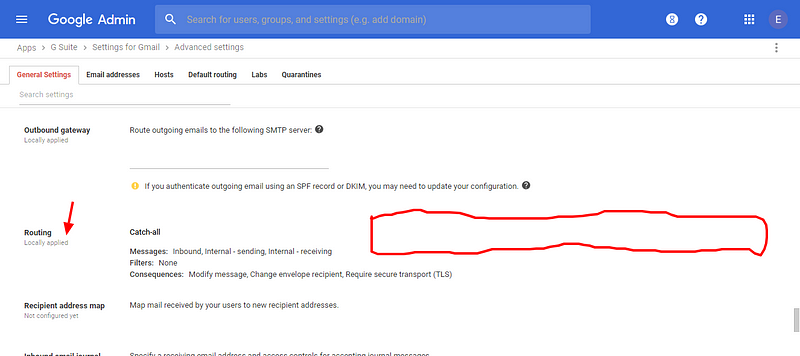
- Find where “Routing Locally applied” is written and click “add a new routing”. This is usually not visible until you hover over it. In the screenshot below, I have highlighted where you need to hover so that “add a new routing” can appear.
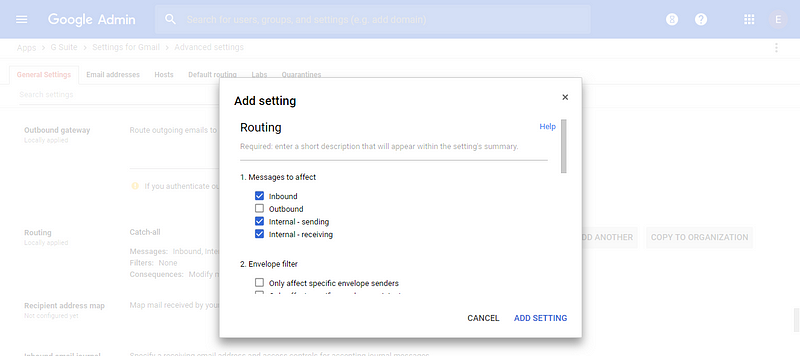
- On the pop-up window, check the boxes for “Inbound”, “Internal — sending”, and “Internal -receiving”.
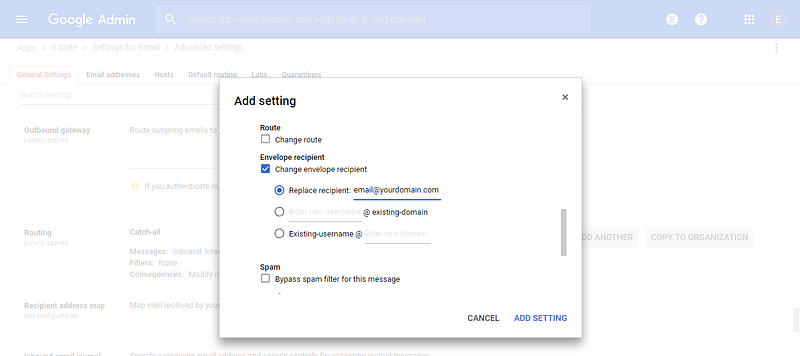
- Scroll down to “Envelope recipient” and check the box for “Change Envelope Recipient”. Under it, check the box for “Replace recipient” Then next to “Replace recipient”, type in the email address whose mailbox you want to use as your catch-all mailbox. This should naturally be your G Suite email address.
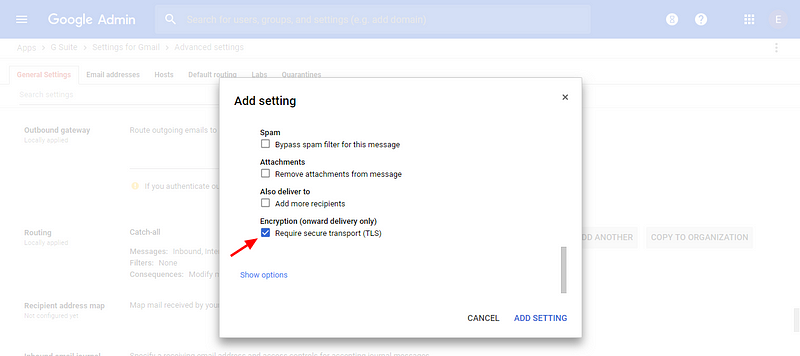
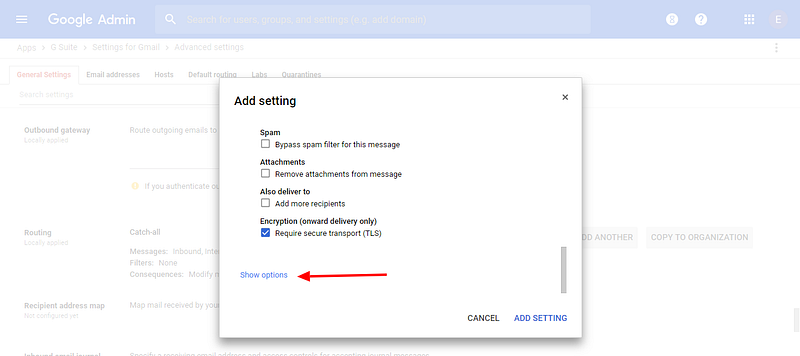
- Scroll down more to “Encryption (onward delivery only)”. Check the box for “Require secure transport (TLS)”
- Below it, click “Show Options”
- More options will appear. Under “Account types to affect”, check the box for “Unrecognized/Catch-all” and click “Add Setting”. This will take you back to the page right under the pop up.
- To save everything, click “save”.

That’s it. You are done. Now emails sent to any unassigned email address on your domain will be routed to the mailbox you chose as your catch-all mailbox.
Next, I will show you how to set up email alias so you can send out or reply to emails as up to 30 unassigned email addresses on your domain.
This article also appeared on Macaulay Gidado’s Medium publication.
SIMILAR POSTS

